First-Time Setup
After installing M2R, follow these steps to log in for the first time, activate your license, and get familiar with the dashboard.
Logging In the First Time
After installing M2R and launching it for the first time, you will be prompted for a user name and password. Use admin for both. You will then be prompted to change the password for the admin user. Make sure you record this user name and password in a safe place.
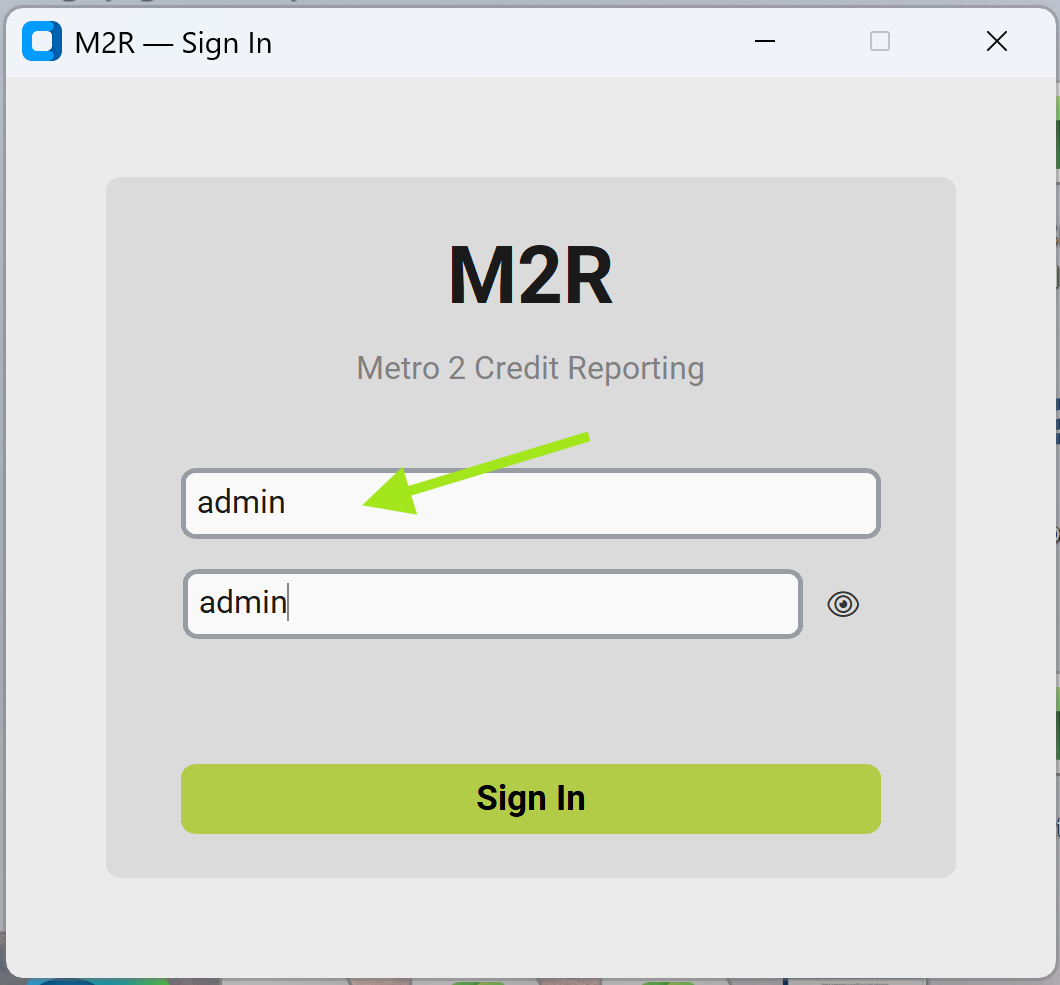
Figure 1: M2R Sign In Screen
How to Activate Your License
Once you sign in, the Software Activation screen appears. You must complete this activation before using the software.
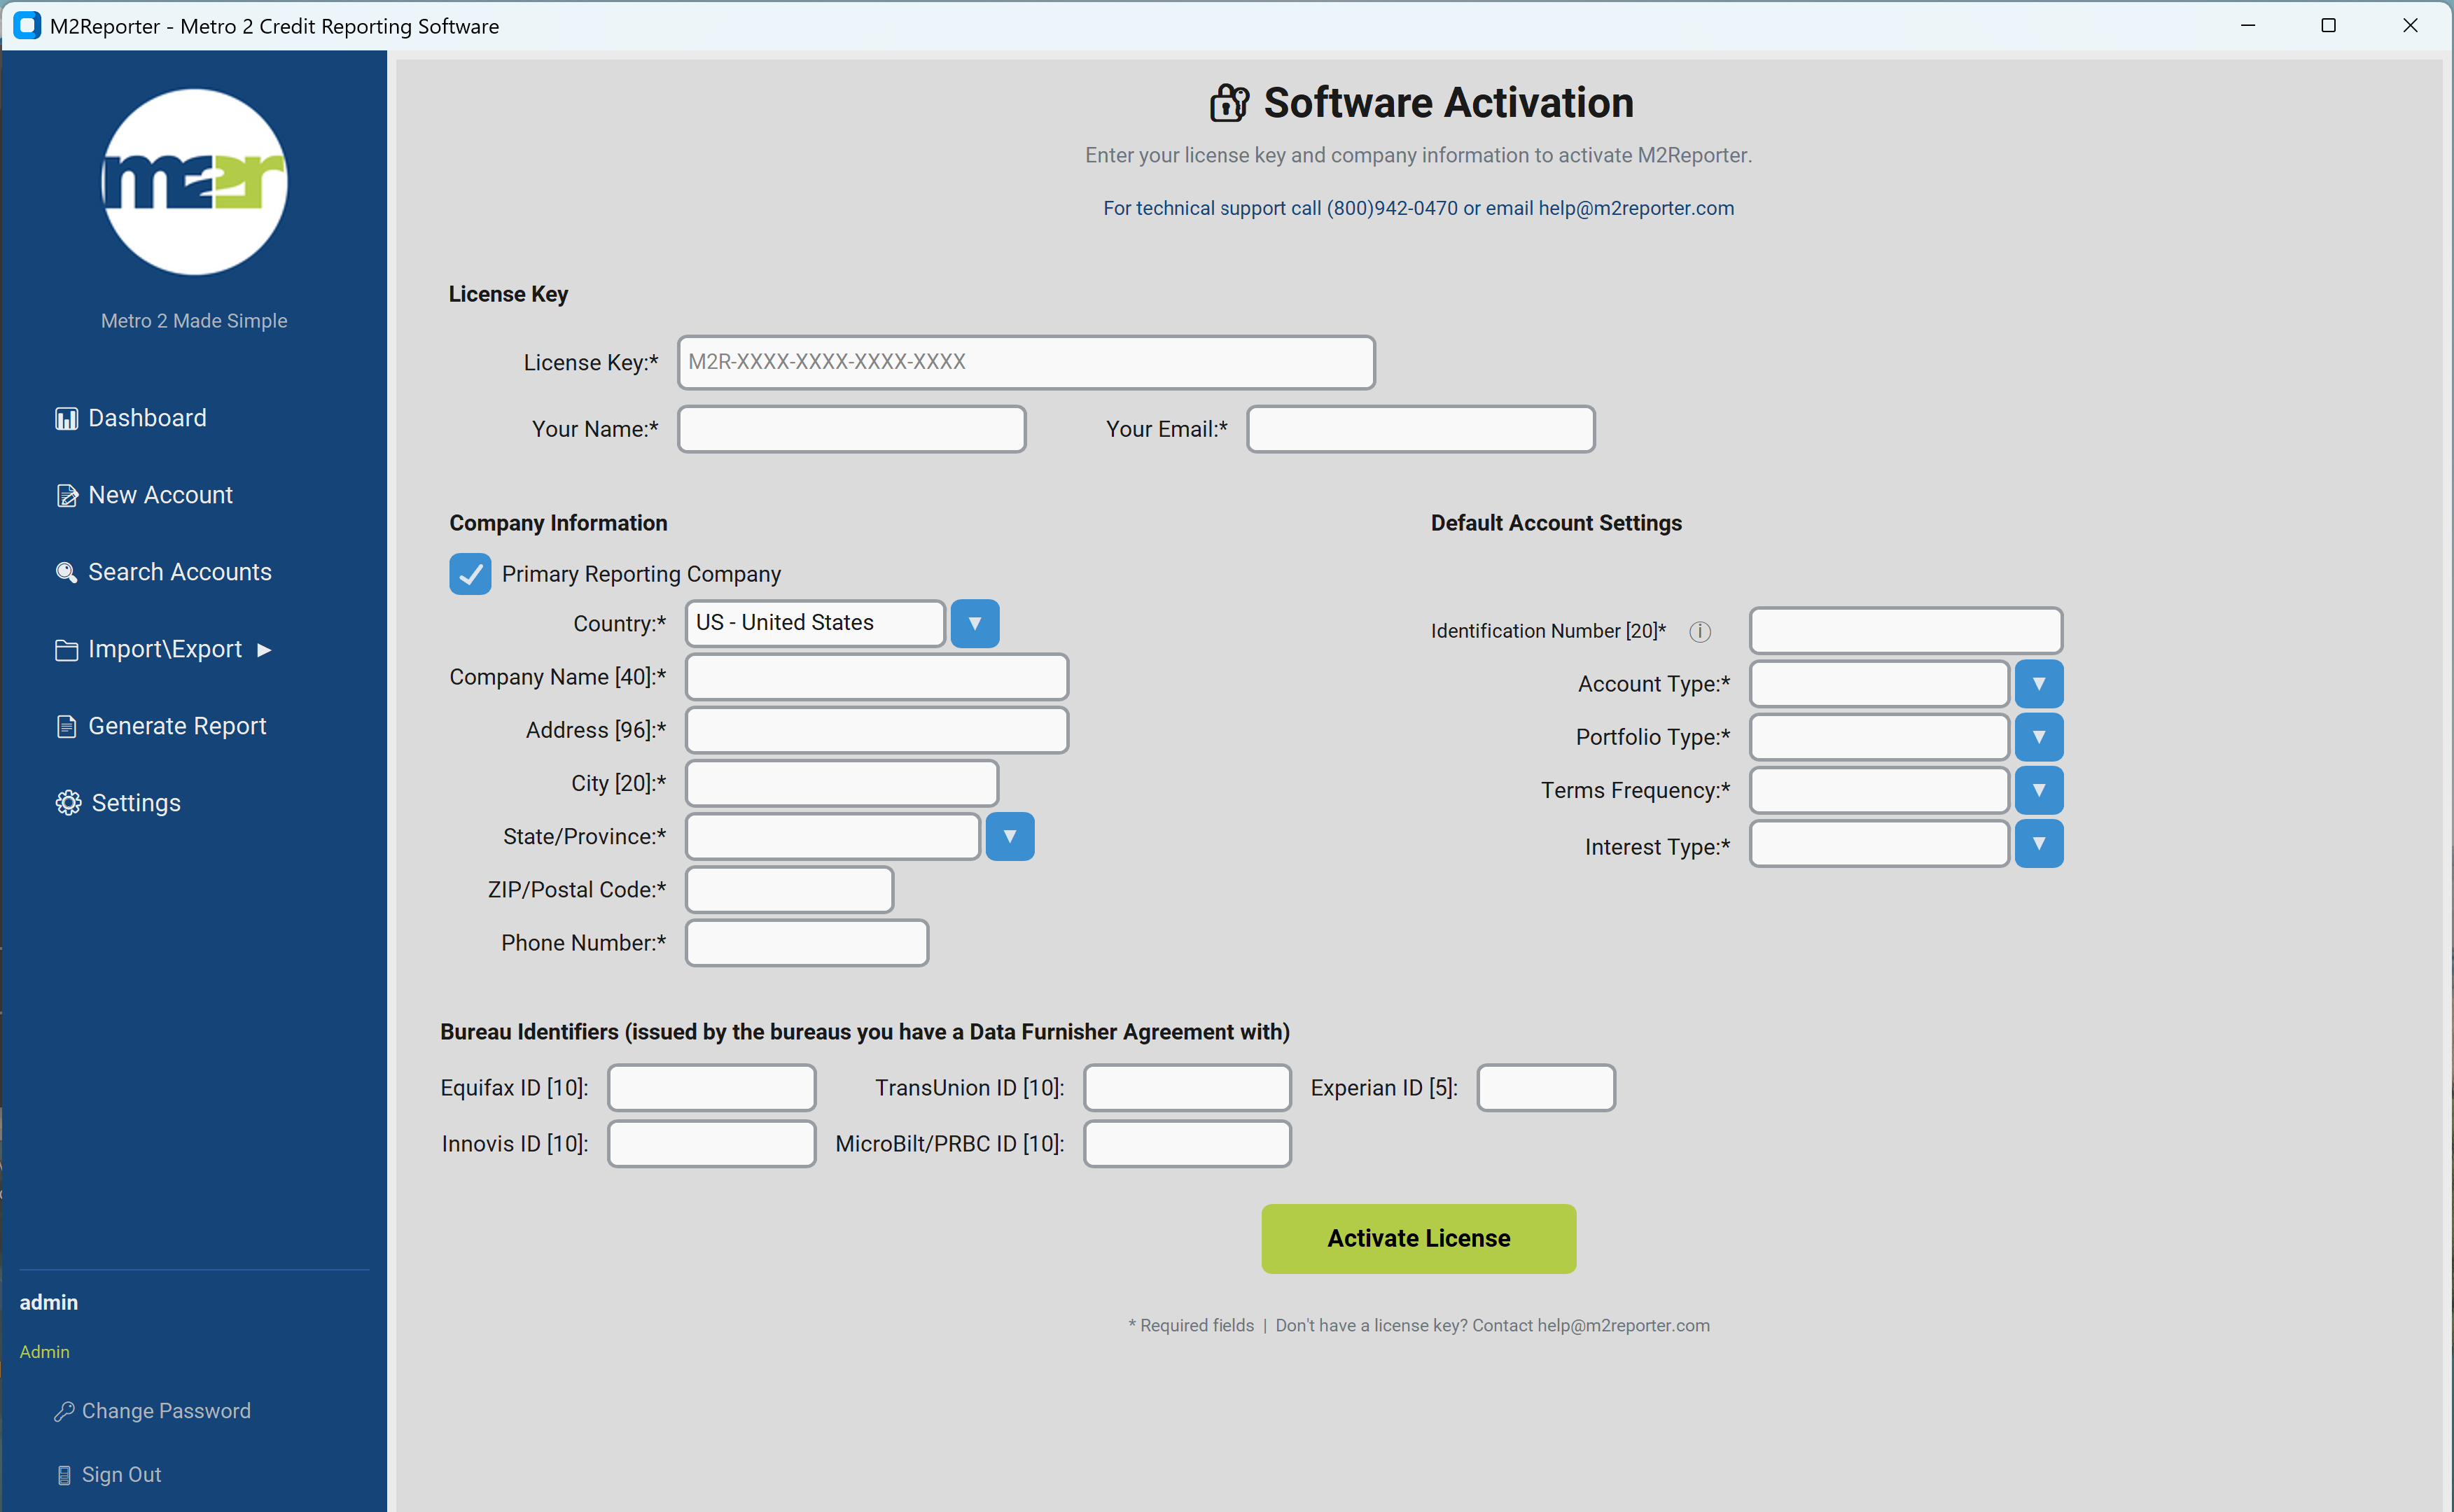
Figure 2: Software Activation Screen
Steps to Activate
- Enter your License Key in the format M2R-XXXX-XXXX-XXXX-XXXX.
- Enter Your Name and Email Address (required fields are marked with *).
- Complete the Company Information section:
- Select your Country from the dropdown
- Enter Company Name [40 characters max]
- Enter Address [96 characters max]
- Enter City [20 characters max]
- Select State/Province from the dropdown
- Enter ZIP/Postal Code
- Enter Phone Number
- Set your Default Account Settings (these pre-fill new account records):
- Identification Number — A unique code (5–20 digits) that you create. This code is registered with your credit bureau account(s) on the first Metro 2® report upload.
- Account Type — Default account type for new accounts. Use the most common type for your company; you can change this per account inside M2R.
- Portfolio Type — Installment, Revolving, Mortgage, etc. Use the most common type; you can change this per account.
- Terms Frequency — Monthly, Weekly, etc. Use the most common; you can change this per account.
- Interest Type — Fixed, Variable, etc. Use the most common; you can change this per account.
- Enter your Bureau Identifiers (issued by each credit bureau). At least one bureau ID is required. If you are still waiting on this information, enter TEST for the bureau(s) you will be reporting to.
- Equifax ID [10 characters]
- TransUnion ID [10 characters]
- Experian ID [5 characters]
- Innovis ID [10 characters]
- MicroBilt/PRBC ID [10 characters]
- Click the Activate License button.
How to Navigate the Dashboard
After successful activation, the Dashboard becomes your home screen. It provides quick access to all major features and displays important statistics about your account portfolio.
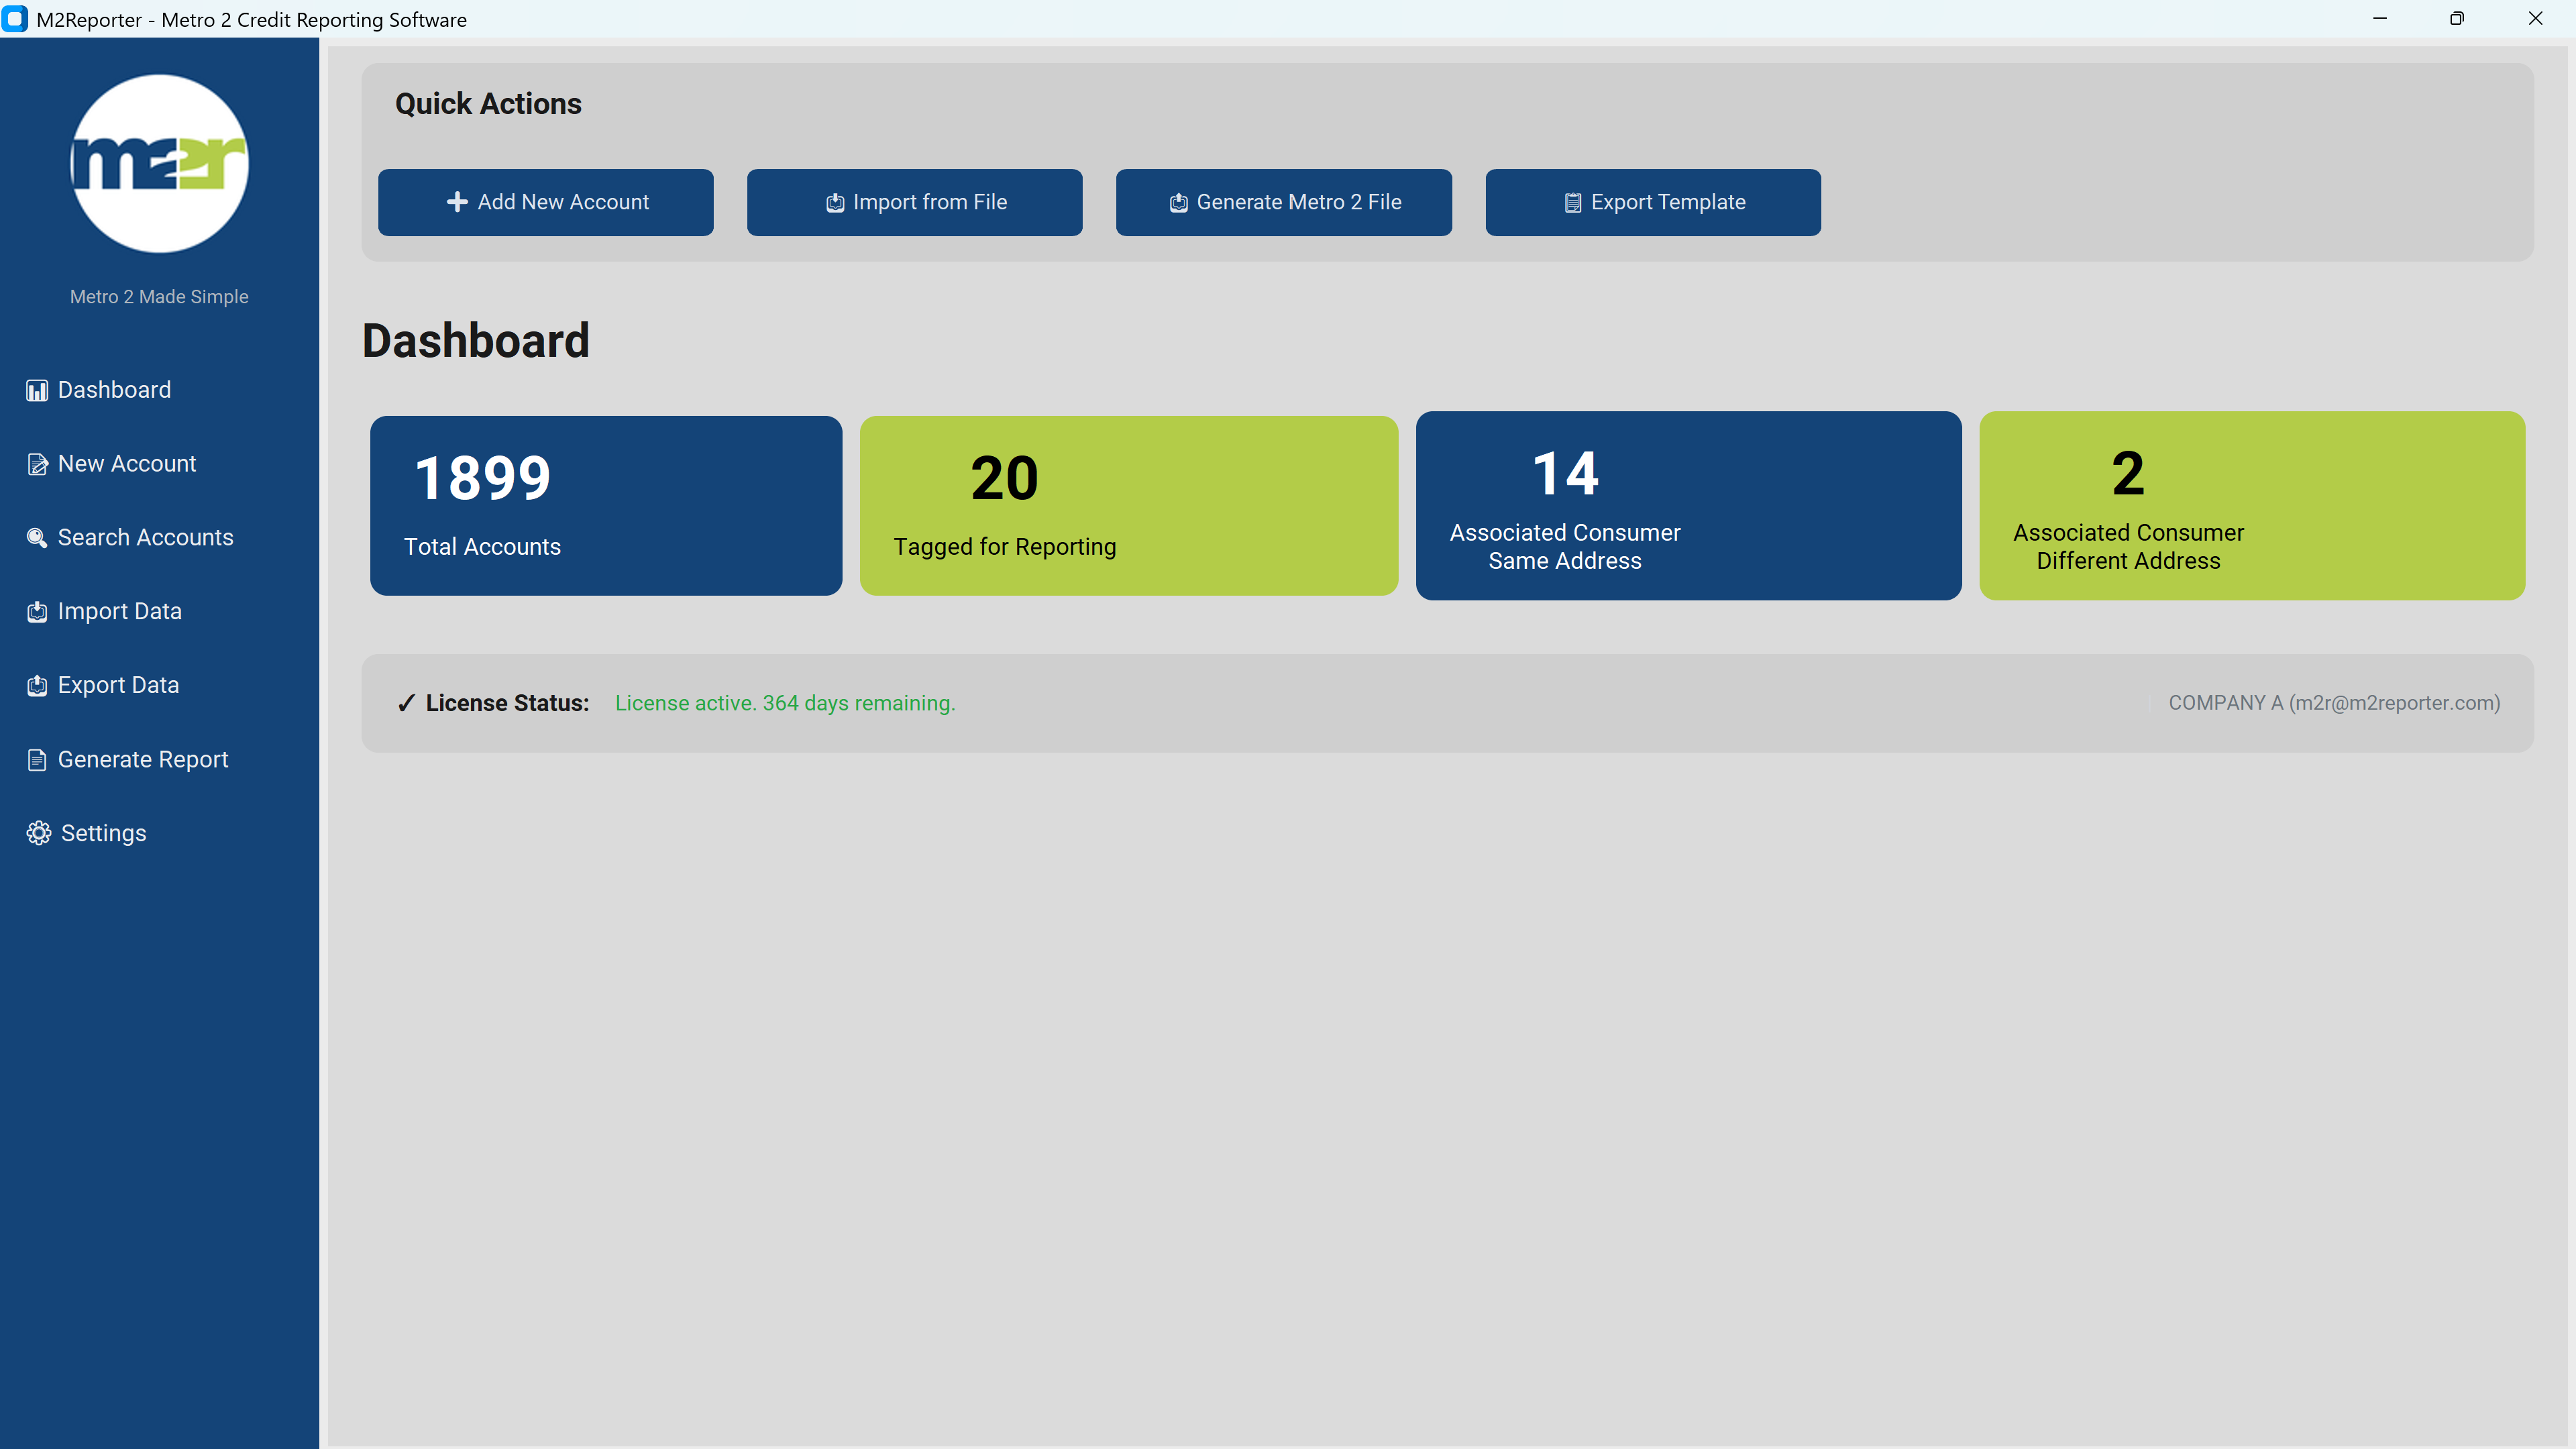
Figure 3: M2R Dashboard
Quick Actions
The Quick Actions bar at the top provides one-click access to common tasks:
| Button | Description |
|---|---|
| + Add New Account | Opens the account entry form to create a new consumer account. |
| Import from File | Opens the import wizard to load accounts from Excel, CSV, or .TXT files. |
| Generate Metro 2® File | Creates a Metro 2® formatted file for submission to credit bureaus. |
| Export Template | Downloads a blank Excel template for data entry that can also be used to import data into M2R. |
Dashboard Statistics
The Dashboard displays four key statistics about your account portfolio:
| Statistic | Description |
|---|---|
| Total Accounts | Total number of consumer accounts in your database. |
| Tagged for Reporting | Accounts marked to be included in the next Metro 2® file. |
| Associated Consumer Same Address | J1 segments — co-signers/joint holders at the same address as the Primary Consumer. |
| Associated Consumer Different Address | J2 segments — co-signers/joint holders at a different address from the Primary Consumer. |
License Status
At the bottom of the Dashboard, the License Status bar shows:
- Your license activation status (active / expired)
- Days remaining until license expiration
- The company name your license is registered to